• Our Etsy Store
  • Vintage
  • Projects
  • Organizing
  • Likes
  • About
  • jeannerondeau.com

Domesticspace

~ Inside. kids, art, home, vintage.

Domesticspace

Tag Archives: wool felt

Wool Felt Coaster DIY

05 Wednesday Sep 2012

Posted by jeannerondeau in Projects, Shop, Vintage

≈ 1 Comment

Tags

diy, Etsy, felt coaster, home, home sewing, home style, lace doily, vintage doilies, wool felt, Wool Felt Central

20120905-214737.jpg

20120905-214809.jpg

20120905-214835.jpg

We made these wool felt coasters from some square lace doilies we found at the flea market. They are a simple cut and stitch project which requires very minimal sewing skills. Round doilies could be substituted if you have those. The simple X stitching we used will work for any shape, and a larger set of doilies would be great as trivets. To make the coasters you will need:
*Wool Felt (This is our favorite)

*Small Doilies

*Pinking Shears

*Straight Pins

*Sewing Machine

*Thread to Match Doilies

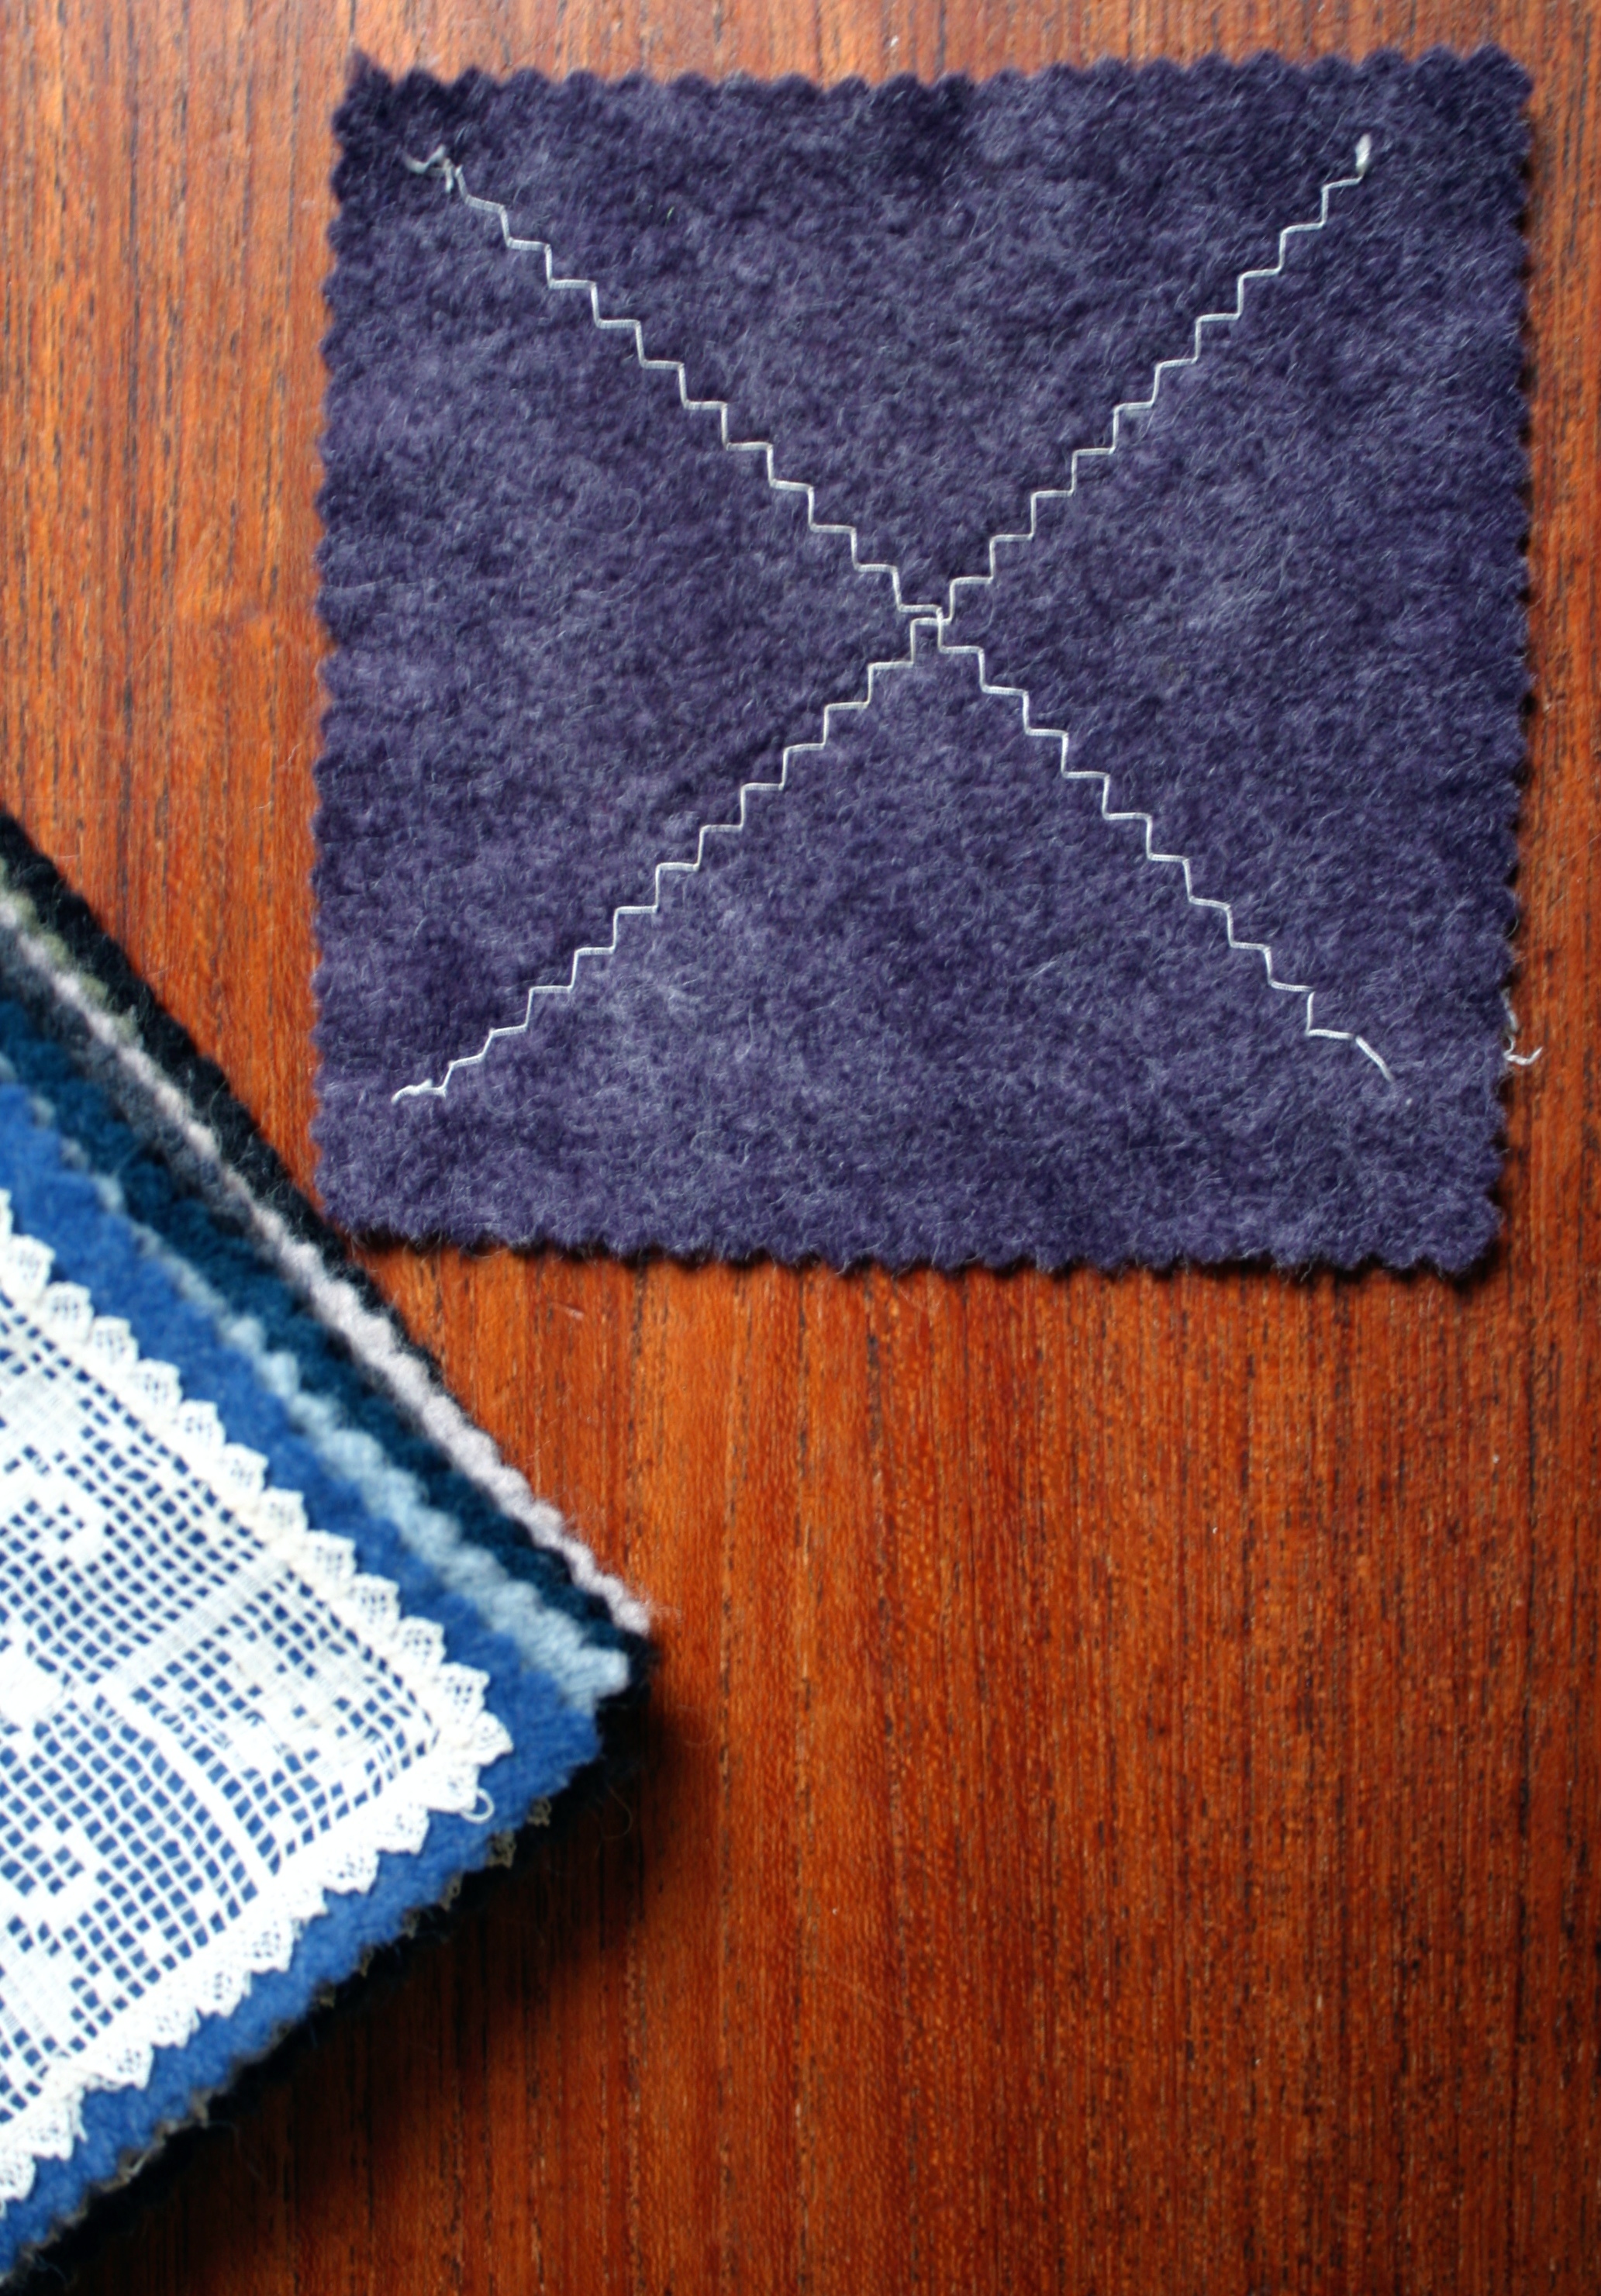
1. Cut felt into squares to match doilies using pinking shears.  (Our squares are 3 1/4″).

2. Iron doilies if needed.

3. Center each doily on top of a felt square and pin in place.

4. Using a zig-zag stitch, sew an X through each coaster as sewn.  Be careful to remove pins as you stitch and to not let the fabrics buckle.

5. Tie the stitch ends on the underside of felt and trim.

6. Make some cocktails!

Advertisement

Share this:

  • Pinterest
  • Facebook
  • LinkedIn
  • Tumblr
  • Twitter

Like this:

Like Loading...

Felt Alphabet Magnets

11 Sunday Mar 2012

Posted by jeannerondeau in Likes, Projects, Shop

≈ 8 Comments

Tags

alphabet, alphabet magnets, blanket stitch, felt letter magnets, felt letters, fridge magnets, kid gifts, Tiny Mighties, wool felt, Wool Felt Central

I made these felt letters for Ada when she was just learning her alphabet.  They have strong magnets sewn inside so they can be stuck on the fridge.  Spelling out the letters of a child’s name also makes a nice gift.  You will need:

*Felt.  We used various colors of wool felt from Woolfeltcentral.com

*Embroidery Floss in contrasting color

*Stuffing

*Two or three Magnets per letter.  We used Tiny Mighties

*Glue

*Paper to make the patterns

1. Type out the alphabet in a simple font and enlarge to desired size.  Our letters are 3″ tall.  Print letters and cut out.

2.Lay paper letter pattern on top of felt and carefully cut along edges of paper to make the letter.  *You will need two- front and back for each letter.

3. Glue magnets onto the inside of the back half of the letter. Space out and use more for longer letters such as ‘M’ and fewer magnets for simple letters like ‘I’.  The magnets will be stitched inside the felt, so you don’t need much glue.

4. Place a little stuffing on top of magnets, between the two felt letter halves.  You can adjust stuffing position as you sew, and the stuffing will help prevent the strong magnets from sticking to each other.

5. Blanket stitch the two letter halves together, making sure the magnets are in the back and the face of the letter is not backwards.  Push any stray stuffing inside as you sew.

6. Allow glue to dry and then put them on the fridge!

If you aren’t feeling crafty you can buy some similar magnets here on Etsy.

Share this:

  • Pinterest
  • Facebook
  • LinkedIn
  • Tumblr
  • Twitter

Like this:

Like Loading...

Felt Raindrops

21 Tuesday Feb 2012

Posted by jeannerondeau in Likes, Projects, Shop

≈ 1 Comment

Tags

bright colors, circles, curtains, felt raindrops, rain, raindrops, running stitch, sewing machine, sun, wool circles, wool felt, Wool Felt Central

We were tired of the rain last week so we decided to hang felt raindrops on the curtains to cheer ourselves up a bit.  The colors looked really pretty against the gray sky.  When the sun came back it made the colors so bright!  The felt chains are really easy to make and are good for a little cheer wherever you need it.  You will need:

*Felt

*Scissors

*Sewing Machine

1. Cut circles from felt.  We did various sizes, free hand.  Wool Felt Central is my favorite felt source.

2.  Line up one felt circle behind the other and do a running stitch through with contrasting thread.  Repeat until you have desired length.

3.  Hang up the rain!

Share this:

  • Pinterest
  • Facebook
  • LinkedIn
  • Tumblr
  • Twitter

Like this:

Like Loading...

Heart Felt Valentine

02 Thursday Feb 2012

Posted by jeannerondeau in Likes, Party!, Projects, Shop

≈ 3 Comments

Tags

blanket stitch, embroidery floss, Envelopemall.com, felt, fridge magnet, heart, Tiny Mighties, Valentine, vellum envelopes, wool felt, Woolfeltcentral.com

These wool felt hearts are really reversible magnets for the fridge.  They are flat enough to put through the mail and make perfect valentines or invitations to a Valentine’s Day party.  You will need:

*Felt.  We used two colors of wool felt from Woolfeltcentral.com

*Embroidery Floss in contrasting color

*Stuffing

*Two small, strong Magnets.  (You only need one if you don’t want the heart to be reversible).  We used Tiny Mighties

*Glue

*Cardstock, or paper to make the pattern

1. Fold cardstock in half, draw half a heart along the fold. Unfold and you will have an even pattern.  Trace onto felt and cut.

2. Glue magnets on inside top of each heart cutout.  You don’t need much glue because the magnets will end up safely inside of the heart and won’t fall off.

3. Place a little stuffing on one side of the heart.  You can adjust stuffing position as you sew, and the stuffing will help prevent the strong magnets from sticking to each other.

4. Blanket stitch the hearts together.  Stuffing and magnets will be inside.  Push any stray stuffing inside as you sew.

5. Allow glue to dry.  If you are putting the heart through the mail you may want to fold it inside a note before putting it in the envelope.  We used vellum envelopes from Envelopemall.com

XOXOX!

Share this:

  • Pinterest
  • Facebook
  • LinkedIn
  • Tumblr
  • Twitter

Like this:

Like Loading...

Beads

26 Thursday Jan 2012

Posted by jeannerondeau in Likes, Projects

≈ 3 Comments

Tags

beads, fine motor skills, hole punch, kid project, Marni, necklace, shoelaces, wool felt, Wool Felt Central

One of my favorite inside projects for kids is making strands of beads.  We started doing them when Ada was about two.  She needed a lot of help at first, but now she asks to do them on her own.  The stringing requires some intense concentration from the child, it is good for their fine motor skills, and I get about an hour of quiet time.  You will need:

*Shoelaces, leather cord or yarn.  If using yarn, put some scotch tape around the end to make the threading easier.

*Beads of various sizes and colors.  It is lovely to see the patterns the kids come up with.

*Dried pasta, felt shapes, etc.  I save scraps of wool felt from other projects and use a hole punch so they can be strung.  I love the variety felt bundles from Wool Felt Central

It is helpful to tie a knot at one end so the beads don’t slip off while the necklace is being made.

I am not sure Marni has done better…

Share this:

  • Pinterest
  • Facebook
  • LinkedIn
  • Tumblr
  • Twitter

Like this:

Like Loading...

Visit Our Etsy Store

Etsy Store Instagram

No Instagram images were found.

Categories

  • Brooklyn
  • Inspiration
  • Likes
  • Organizing
  • Our Etsy Store
  • Party!
  • Projects
  • Shop
  • Uncategorized
  • Vintage

Recent Posts

  • Visit Us at the Brooklyn Flea!
  • Inspiration
  • Inspiration
  • Winter Whites
  • Ocean Grove, NJ

Archives

Enter your email address to follow this blog and receive notifications of new posts by email.

Join 184 other subscribers

Blogs I Read

  • A Beautiful Mess
  • Anthology Magazine
  • Apartment Therapy Family (Ohdeedoh)
  • Bleubird Vintage
  • Katie's Pencil Box
  • Le Dans La
  • Making it Lovely
  • Oh Happy Day!
  • Oh My Little Dears
  • Purl Bee
  • Soulemama
  • Sweet Paul Magazine
  • The Sweetest Occasion
  • You Are My Fave

Copyright

All content is © 2010-2018 Jeanne Rondeau. Please do not copy or take images or content from this site without my permission. Requests may be sent to: jeanne@jeannerondeau.com Thank you!

Meta

  • Register
  • Log in
  • Entries feed
  • Comments feed
  • WordPress.com

Blog at WordPress.com.

Privacy & Cookies: This site uses cookies. By continuing to use this website, you agree to their use.
To find out more, including how to control cookies, see here: Cookie Policy
  • Follow Following
    • Domesticspace
    • Join 179 other followers
    • Already have a WordPress.com account? Log in now.
    • Domesticspace
    • Customize
    • Follow Following
    • Sign up
    • Log in
    • Report this content
    • View site in Reader
    • Manage subscriptions
    • Collapse this bar
 

Loading Comments...
 

    %d bloggers like this: