• Our Etsy Store
  • Vintage
  • Projects
  • Organizing
  • Likes
  • About
  • jeannerondeau.com

Domesticspace

~ Inside. kids, art, home, vintage.

Domesticspace

Category Archives: Projects

Inspiration

03 Friday Mar 2017

Posted by jeannerondeau in Our Etsy Store, Party!, Projects, Uncategorized

≈ Leave a comment

Tags

Asbury Park NJ, DIY Pillow Cover, family, flea market finds, Ikea Feather Pillow, Liberty of London, Ocean Grove NJ, Purl Soho, vintage finds, Write to the President

inspiration

Some things from the last week:

*Antique Cast Iron Door Stop in our Etsy Shop.

*Liberty of London Fabric from Purl Soho.  We made covers with Liberty fabric for these inexpensive Ikea feather pillows.  The girls use them to lounge on when reading in bed.

*Detail of Vintage Wooden Sign in our Etsy Shop.

*Large Ironstone Urn in our Etsy Shop, perfect for holding umbrellas.

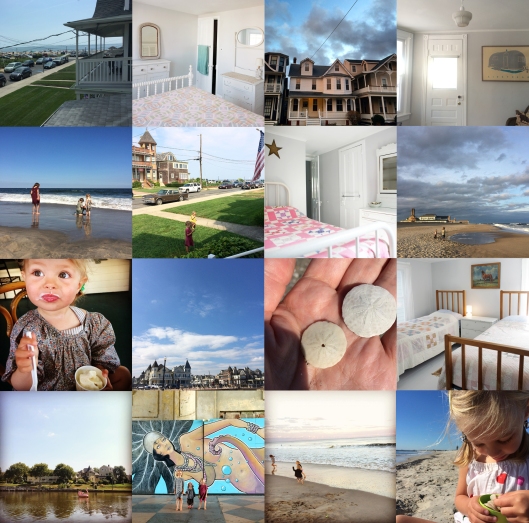
*View of Asbury Park from the Ocean Grove boardwalk.  We are thinking of those who lost their homes today in an early morning fire.  A heartbreaking loss for our little town.

*Cozy front porch in Ocean Grove.  We are feeling both sad for the loss of some of our town’s historic houses and thankful that no one was hurt today.

*Post Cards to the President.  I send these often, addressed to the White House.  I know he will likely never read them, but I use them as sort of therapy now.

*Lemon, Lemon, Lemon Cake for Josie’s Birthday.  I used a version of this lemon poppyseed cake and this lemon frosting, along with lemon curd from Trader Joe’s. Our backyard hellebores bloomed just in time to use for decoration.

*More Liberty of London.  I have a bit of an addiction.

Stay cozy and have a great weekend!


Advertisement

Share this:

  • Pinterest
  • Facebook
  • LinkedIn
  • Tumblr
  • Twitter

Like this:

Like Loading...

Ocean Grove, NJ

29 Tuesday Mar 2016

Posted by jeannerondeau in Brooklyn, Inspiration, Likes, Projects, Uncategorized

≈ Leave a comment

Tags

Asbury Park, Asbury Park NJ, beach, family, family vacation, flea market, Jersey Shore, Kids, Ocean Grove, Ocean Grove NJ, summer rental, vacation home, VRBO Ocean Grove

HeckInsta

We have fallen in love with a magic little town on the coast of New Jersey.  Chris and I drove through Ocean Grove one day and were charmed by the tiny square mile of preserved Victorian homes perched close to the shore.  The houses were impossibly detailed and cared for and the town was beautiful, quiet and slow-paced.  The beach in Ocean Grove was voted one of the world’s 15 best by Fodor’s Travel.  A quick stroll on the boardwalk or over two footbridges brought us to newly revitalized Asbury Park.  We joked that we would have to retire there when our kids were grown.

When I learned about the town’s twice annual Giant Flea Market I marked my calendar.  The drive from Brooklyn took me less than 1 1/2 hours and the first time I went to the flea I was hooked.  Wandering around town felt like a dream and each time I visited I liked it even more.  When I returned to the flea this past May I called Chris to tell him I was going to talk to a realtor.  In the whirlwind that followed we ended up looking at 10 houses.  Our plan was to find a house that we could rent when we weren’t using it.  The house we fell for was built in the 1880s and was owned by one family for more than 70 years.   After talking to many incredibly friendly residents we decided Ocean Grove would be the perfect spot to spend time with our girls while they are still young.

The house at 6 1/2 Heck Avenue is calm bright and airy.  It stands fifth in from the beach and has beautiful ocean views.  Many of the home’s original antiques are in use throughout the house.  The town of Ocean Grove was founded by a group of religious leaders as an ocean side retreat in the 1860s.  Our home feels like stepping back into Ocean Grove’s early days when families would escape to the shore away from busy lives.  The home is simple compared to some of its brightly painted neighbors and we love that it retains its original details and quiet beach cottage feel.  Visit our Instagram feed  @oceangrovehouse for more photos.

We are honored to be able to care for the home at 6 1/2 Heck Avenue and excited to share it for 2016 rentals.  For rental inquiries and questions please contact Alfredo Fresnedo at (732)-763-2961, alfresnedo@yahoo.com.  We still feel like we discovered a secret hideout every time we visit our home in Ocean Grove.  So many memories have been made in the short time we have owned the house.  We are so happy to share our home with visitors and hope 6 1/2 Heck will be a place for memories of your own.

Share this:

  • Pinterest
  • Facebook
  • LinkedIn
  • Tumblr
  • Twitter

Like this:

Like Loading...

DIY Watercolor Wrapping Paper

25 Tuesday Feb 2014

Posted by jeannerondeau in Party!, Projects

≈ 1 Comment

Tags

DIY birthday, DIY gift wrap, diy paper, DIY Watercolor Wrapping Paper, gift wrap, home, Hug Snug, life with kids, seam binding, watercolor diy

Splatter2

I ran upstairs to wrap presents for Josie the other day and realized that although we were well-stocked with holiday paper, we were fresh out of anything appropriate for a birthday.  Dare was napping, so I had a few minutes of quiet to get creative.  This splatter paper took me less than ten minutes to make and I was happy the results.  To make your own Watercolor Wrapping Paper you will need:

*Roll of Blank Paper (We used a roll from Ikea that is for the girls’ easel)

*Watercolor or Acrylic Paints

*Medium-sized Paint Brush

*Water

1. Unroll paper.

2. Mix paint and water until it is the desired color. (The more water you use, the fainter the color will be when dry).

3. Splatter the paint on to the paper with the brush.  Change water and wash brush between color changes to keep paint from looking muddy.

4. Allow paint to dry.

5. Wrap!  Seam binding is my favorite gift-wrapping ribbon.Splatter3Splatter4Splatter6

Share this:

  • Pinterest
  • Facebook
  • LinkedIn
  • Tumblr
  • Twitter

Like this:

Like Loading...

DIY Knit Cashmere Hoodie

05 Wednesday Feb 2014

Posted by jeannerondeau in Brooklyn, Likes, Projects, Shop

≈ 2 Comments

Tags

Brooklyn General Store, cashmere yarn, diy hat, easy knit hat, knit child hat, knits for kids, knitting pattern, Lyalya Etsy, Lyalya Hoodie ABC Pattern, ribbed hoodie pattern

Hat1 Hat3 Hat4 Hat2

Chris has been begging me to knit him a sweater for years now. I am sure I will get to his sweater one of these days, but there are so many sweet knitting patterns for children to get through while our kids are still small…This is one of my favorites:  The Lyalya Hoodie ABC Pattern.  The pattern comes with directions for ages six months-adult.  I knitted this one up in Brooklyn General Store’s cashmere.  I splurge on this amazing yarn once in a while and it is the softest, most beautiful yarn I have ever knit.  (Even the letter-pressesd label is gorgeous).  I made Ada a couple of hats made from the yarn and they still look beautiful after years of use.  Lyalya’s pattern knits up quickly and it is fun to watch the ribs build as you go.  The result is a snuggly hat that does not require tying on to a wiggly three-year-old.  The cashmere is so soft that scratchy-hat whining is completely avoided.

Share this:

  • Pinterest
  • Facebook
  • LinkedIn
  • Tumblr
  • Twitter

Like this:

Like Loading...

DIY Heart Stencil Valentine

29 Wednesday Jan 2014

Posted by jeannerondeau in Projects

≈ Leave a comment

Tags

class Valentines, crayon Valentine, diy kids Valentines, DIY valentine, diy Valentine card, heart stencil, kid Valentines, paper valentine, stencil Valentine, sugar-free Valentine

StencilHeartsOverlap StencilFlowers2 StencilHeartEnvelopes

These Heart Stencil Valentines are simple to make and require only simple supplies to complete.  To make your own you will need:

*Card Stock

*Scissors

*Crayons

*Envelopes (Optional)

1. Fold a piece of card stock in half.

2. Draw half a heart along the crease and cut out.

3. Unfold and you will have a symmetrical heart stencil.  Repeat steps 1-3 to make different size heart stencils.

4. Place stencil on top of blank card, hold firmly in place and rub crayon over the opening, completely filling in the heart shape.

5. Remove stencil and repeat.

6. We overlapped various size heart stencils and colored them in with different crayons to create a pretty pattern on the first card.  We drew stems and leaves under heart shapes to make a garden of flowers on the second card.

XOXO

StencilHeartStencilHeartFlowerHeartStencil1

Share this:

  • Pinterest
  • Facebook
  • LinkedIn
  • Tumblr
  • Twitter

Like this:

Like Loading...

DIY Teacher Tote Gifts and Valentines

15 Wednesday Jan 2014

Posted by jeannerondeau in Projects

≈ 4 Comments

Tags

canvas bag Valentine, DIY canvas bag, DIY gift, DIY teacher gift, DIY tote bag, DIY Valentine gift, kid made Valentine, Say Yes to Hoboken, School Notebook Sewn Canvas Tote Bag, teacher Valentine

SchoolBag1
We found the tutorial for these awesome School Notebook Sewn Canvas Tote Bags comes on Say Yes to Hoboken‘s pretty blog.  (Frankly I am annoyed with myself for not coming up with this clever idea).  We made a couple up for Ada’s teachers as holiday gifts.  They are simple to complete, cute and functional – pretty much a perfect DIY.  These would also make great Valentine gifts with a child’s drawing of a little heart, XOXO, or love note written in fabric marker between the stitched lines.   SchoolBag3 SchoolBag2

Share this:

  • Pinterest
  • Facebook
  • LinkedIn
  • Tumblr
  • Twitter

Like this:

Like Loading...

DIY Watercolor Christmas Trees

13 Friday Dec 2013

Posted by jeannerondeau in Party!, Projects

≈ Leave a comment

Tags

DIY Christmas, DIY kid craft, glitter decoration, paper Christmas trees, paper craft for kids, paper tree, sequin Christmas, watercolor Christmas tree, watercolor decoration, watercolor tree

Trees1 Trees2 Trees3 Trees4 Trees5
We have been holding off on decorating the tree until this weekend.  (We actually bought one last Saturday and stuck it in the back yard.  It has been taunting the kids through the window all week and is now frozen into a bucket of ice…)  In order to distract the girls from the trimming of the real tree, we came up with these paper versions.  To make your own Watercolor Christmas Trees you will need:

*Heavy Weight Paper.  (We used this Kid Made Modern Paper)

*Watercolors and Brushes

*Scissors

*Craft Glue

*Sequins, Glitter, Colored Pencils

1. Draw and cut out various sizes of triangles and rectangles.  You need three triangles and one rectangle per tree.

2. Paint triangles with greens and rectangles with browns.  Allow paint to dry.

3. Assemble and glue tree together.  (We stared with the stem and then layered triangles in decreasing size as we worked our way up).   Allow to dry.

4. While you are waiting, have kids draw and cut out stars using the scrap paper.  Ada added some grass and a single triangle tree made with colored pencils.

5. Glue on glitter, sequins, stars and paper ornaments.

6. Allow trees to dry and then hang up the forest.

Share this:

  • Pinterest
  • Facebook
  • LinkedIn
  • Tumblr
  • Twitter

Like this:

Like Loading...

Crowns

20 Wednesday Nov 2013

Posted by jeannerondeau in Likes, Projects, Shop, Vintage

≈ Leave a comment

Tags

child crown, crepe paper crown, crown gift, diy crown, Etsy crowns, feather band, headband crown, how to make a paper crown, vintage glitter crown, vintage tiara

Crowns
Crown Collection, Ada’s Mantel:

1. Headband Feather Crown, here

2. Crepe Paper Flower Crowns, DIY here

3. Vintage Glitter Party Crown, similar here

4. White Metal Crown from Aunt Sandy, similar here

What would I have done with boys?

Share this:

  • Pinterest
  • Facebook
  • LinkedIn
  • Tumblr
  • Twitter

Like this:

Like Loading...

DIY Lampshade Refresh

18 Monday Nov 2013

Posted by jeannerondeau in Projects

≈ Leave a comment

Tags

diy, diy lamp shade, easy lampshade diy, home, home diy, home improvement, how to recover a lampshade, life with kids, linen lampshade, linen lampshade diy

Lamp1Lamp2
We have started a list of house projects for the upcoming indoor season.  Chris and I have a habit of getting overwhelmed by the number of things that need to be home-improved around here, and it prevents us from making progress on any of them.  We have decided to break down smaller projects and finish one per month while we save and plan for a huge house renovation.  One of the things on my list was to fix this little lamp’s shade.  We have had the lamp next to the bed for a long time, but the shade was always a little strange.  I got really sick of it when I was pregnant, borrowed some of Ada’s acrylic paints and covered it with what turned out to be an even stranger pearly metallic green.  We then bought and then returned two replacement shades, neither of which looked quite right above the little basket.  Finally I decide to try covering the existing shade with linen.  It was such a simple project and took less than an hour.  Such an improvement!  Why hadn’t I thought of that years ago?  To refresh your own lamp shade you will need:

* Linen Fabric (Be sure the fabric color and weave is heavy enough to cover existing shade color)

*Paper for Pattern

*Ruler

*Pencil

*Scissors

*Craft Glue

*Large Paintbrush

*Ribbon (To cover top edge)

Lamp4
1. Using your ruler, draw a straight line down from top to bottom of the lamp shade.  (Or use the existing seam if your shade has one).  Position the shade’s pencil line along the edge of paper.

2.  Roll shade and trace outline, stopping when you return to the line on shade.  The shade will create a curved shape as it rolls. Using the ruler, draw a straight line 1/4″ past the point where the shade stopped rolling.  This will allow for overlap of the fabric and create a neat seam on the lampshade.

3. Add 1/4″ each on top and bottom of curve.  This will fold over top and bottom of shade.
Lamp5
4. Cut out paper pattern, place on linen and cut out.
Lamp6
5. Squirt glue onto one side of the shade, as show.  (Don’t cover the whole shade at once or it will be messy).
Lamp7
6. Use your brush to evenly smooth out glue.Lamp8
7. Slowly roll shade onto linen, keeping it the 1/4″ on top and bottom.
Lamp9
8. Add more glue, brush and roll until shade is covered.  Slightly overlap the ends of the linen, glue and press down neatly.

9. Brush a little glue along the inside top of shade and fold linen over.  Gently press and smooth with your fingers as you go to work out any bumps in the linen.

10. Repeat for bottom of shade as shown.
11. Brush on glue and smooth ribbon on to top of shade.  You can add a bottom ribbon as well.

12. Allow glue to dry and try on your new shade!
Lamp1
Lamp3

Share this:

  • Pinterest
  • Facebook
  • LinkedIn
  • Tumblr
  • Twitter

Like this:

Like Loading...

DIY Ribbon Wand

12 Tuesday Nov 2013

Posted by jeannerondeau in Projects

≈ Leave a comment

Tags

dance diy, dance ribbon, DIY Ribbon Wand, dowel ribbon wand, how to make ribbon wand, life with kids, party favor diy, rainy day project for kids, ribbon wand diy, seam binding project

Wand2 Wand1 Wand3
Ada had a half day of school last week and it rained, so we needed a project to keep the girls busy in the house.  We came up with these ribbon wands.  Josie loves the wands at her dance class and we had the supplies at home already.  The girls picked out their ribbon colors, I attached them to the dowels and Ada tuned her radio to a classical station for a ballerina dance party.   To make your ribbon wand you will need:

*Dowel (we cut ours in half)

*Lightweight Ribbons or Seam Binding

*Craft Glue

*Needle and Thread

*Scissors or Pinking Shears

1. Cut ribbons to desired length.

2. Line up ribbon ends in a stack.

3. Put a bit of glue at the end of the dowel and wrap ribbons around the dowel as shown.

4. Put a bit more glue at the end of the ribbon wrap and stitch into place.

5. If ribbons unravel at the ends, use pinking shears and seal ends with a bit of glue.

6. Allow glue to dry and start dancing.

Wand3

Share this:

  • Pinterest
  • Facebook
  • LinkedIn
  • Tumblr
  • Twitter

Like this:

Like Loading...
← Older posts

Visit Our Etsy Store

Etsy Store Instagram

No Instagram images were found.

Categories

  • Brooklyn
  • Inspiration
  • Likes
  • Organizing
  • Our Etsy Store
  • Party!
  • Projects
  • Shop
  • Uncategorized
  • Vintage

Recent Posts

  • Visit Us at the Brooklyn Flea!
  • Inspiration
  • Inspiration
  • Winter Whites
  • Ocean Grove, NJ

Archives

Enter your email address to follow this blog and receive notifications of new posts by email.

Join 184 other subscribers

Blogs I Read

  • A Beautiful Mess
  • Anthology Magazine
  • Apartment Therapy Family (Ohdeedoh)
  • Bleubird Vintage
  • Katie's Pencil Box
  • Le Dans La
  • Making it Lovely
  • Oh Happy Day!
  • Oh My Little Dears
  • Purl Bee
  • Soulemama
  • Sweet Paul Magazine
  • The Sweetest Occasion
  • You Are My Fave

Copyright

All content is © 2010-2018 Jeanne Rondeau. Please do not copy or take images or content from this site without my permission. Requests may be sent to: jeanne@jeannerondeau.com Thank you!

Meta

  • Register
  • Log in
  • Entries feed
  • Comments feed
  • WordPress.com

Create a free website or blog at WordPress.com.

Privacy & Cookies: This site uses cookies. By continuing to use this website, you agree to their use.
To find out more, including how to control cookies, see here: Cookie Policy
  • Follow Following
    • Domesticspace
    • Join 179 other followers
    • Already have a WordPress.com account? Log in now.
    • Domesticspace
    • Customize
    • Follow Following
    • Sign up
    • Log in
    • Report this content
    • View site in Reader
    • Manage subscriptions
    • Collapse this bar
 

Loading Comments...
 

    %d bloggers like this: