• Our Etsy Store
  • Vintage
  • Projects
  • Organizing
  • Likes
  • About
  • jeannerondeau.com

Domesticspace

~ Inside. kids, art, home, vintage.

Domesticspace

Category Archives: Projects

DIY Woven Washi Tape Valentine

01 Friday Feb 2013

Posted by jeannerondeau in Projects

≈ 4 Comments

Tags

diy, DIY Valentines, Envelope Mall, heart shaped valentine, life with kids, Valentine cards, Valentines by kids, vellum envelope, washi tape project, washi tape valentine

Woven1Woven2Woven3Woven4Woven5
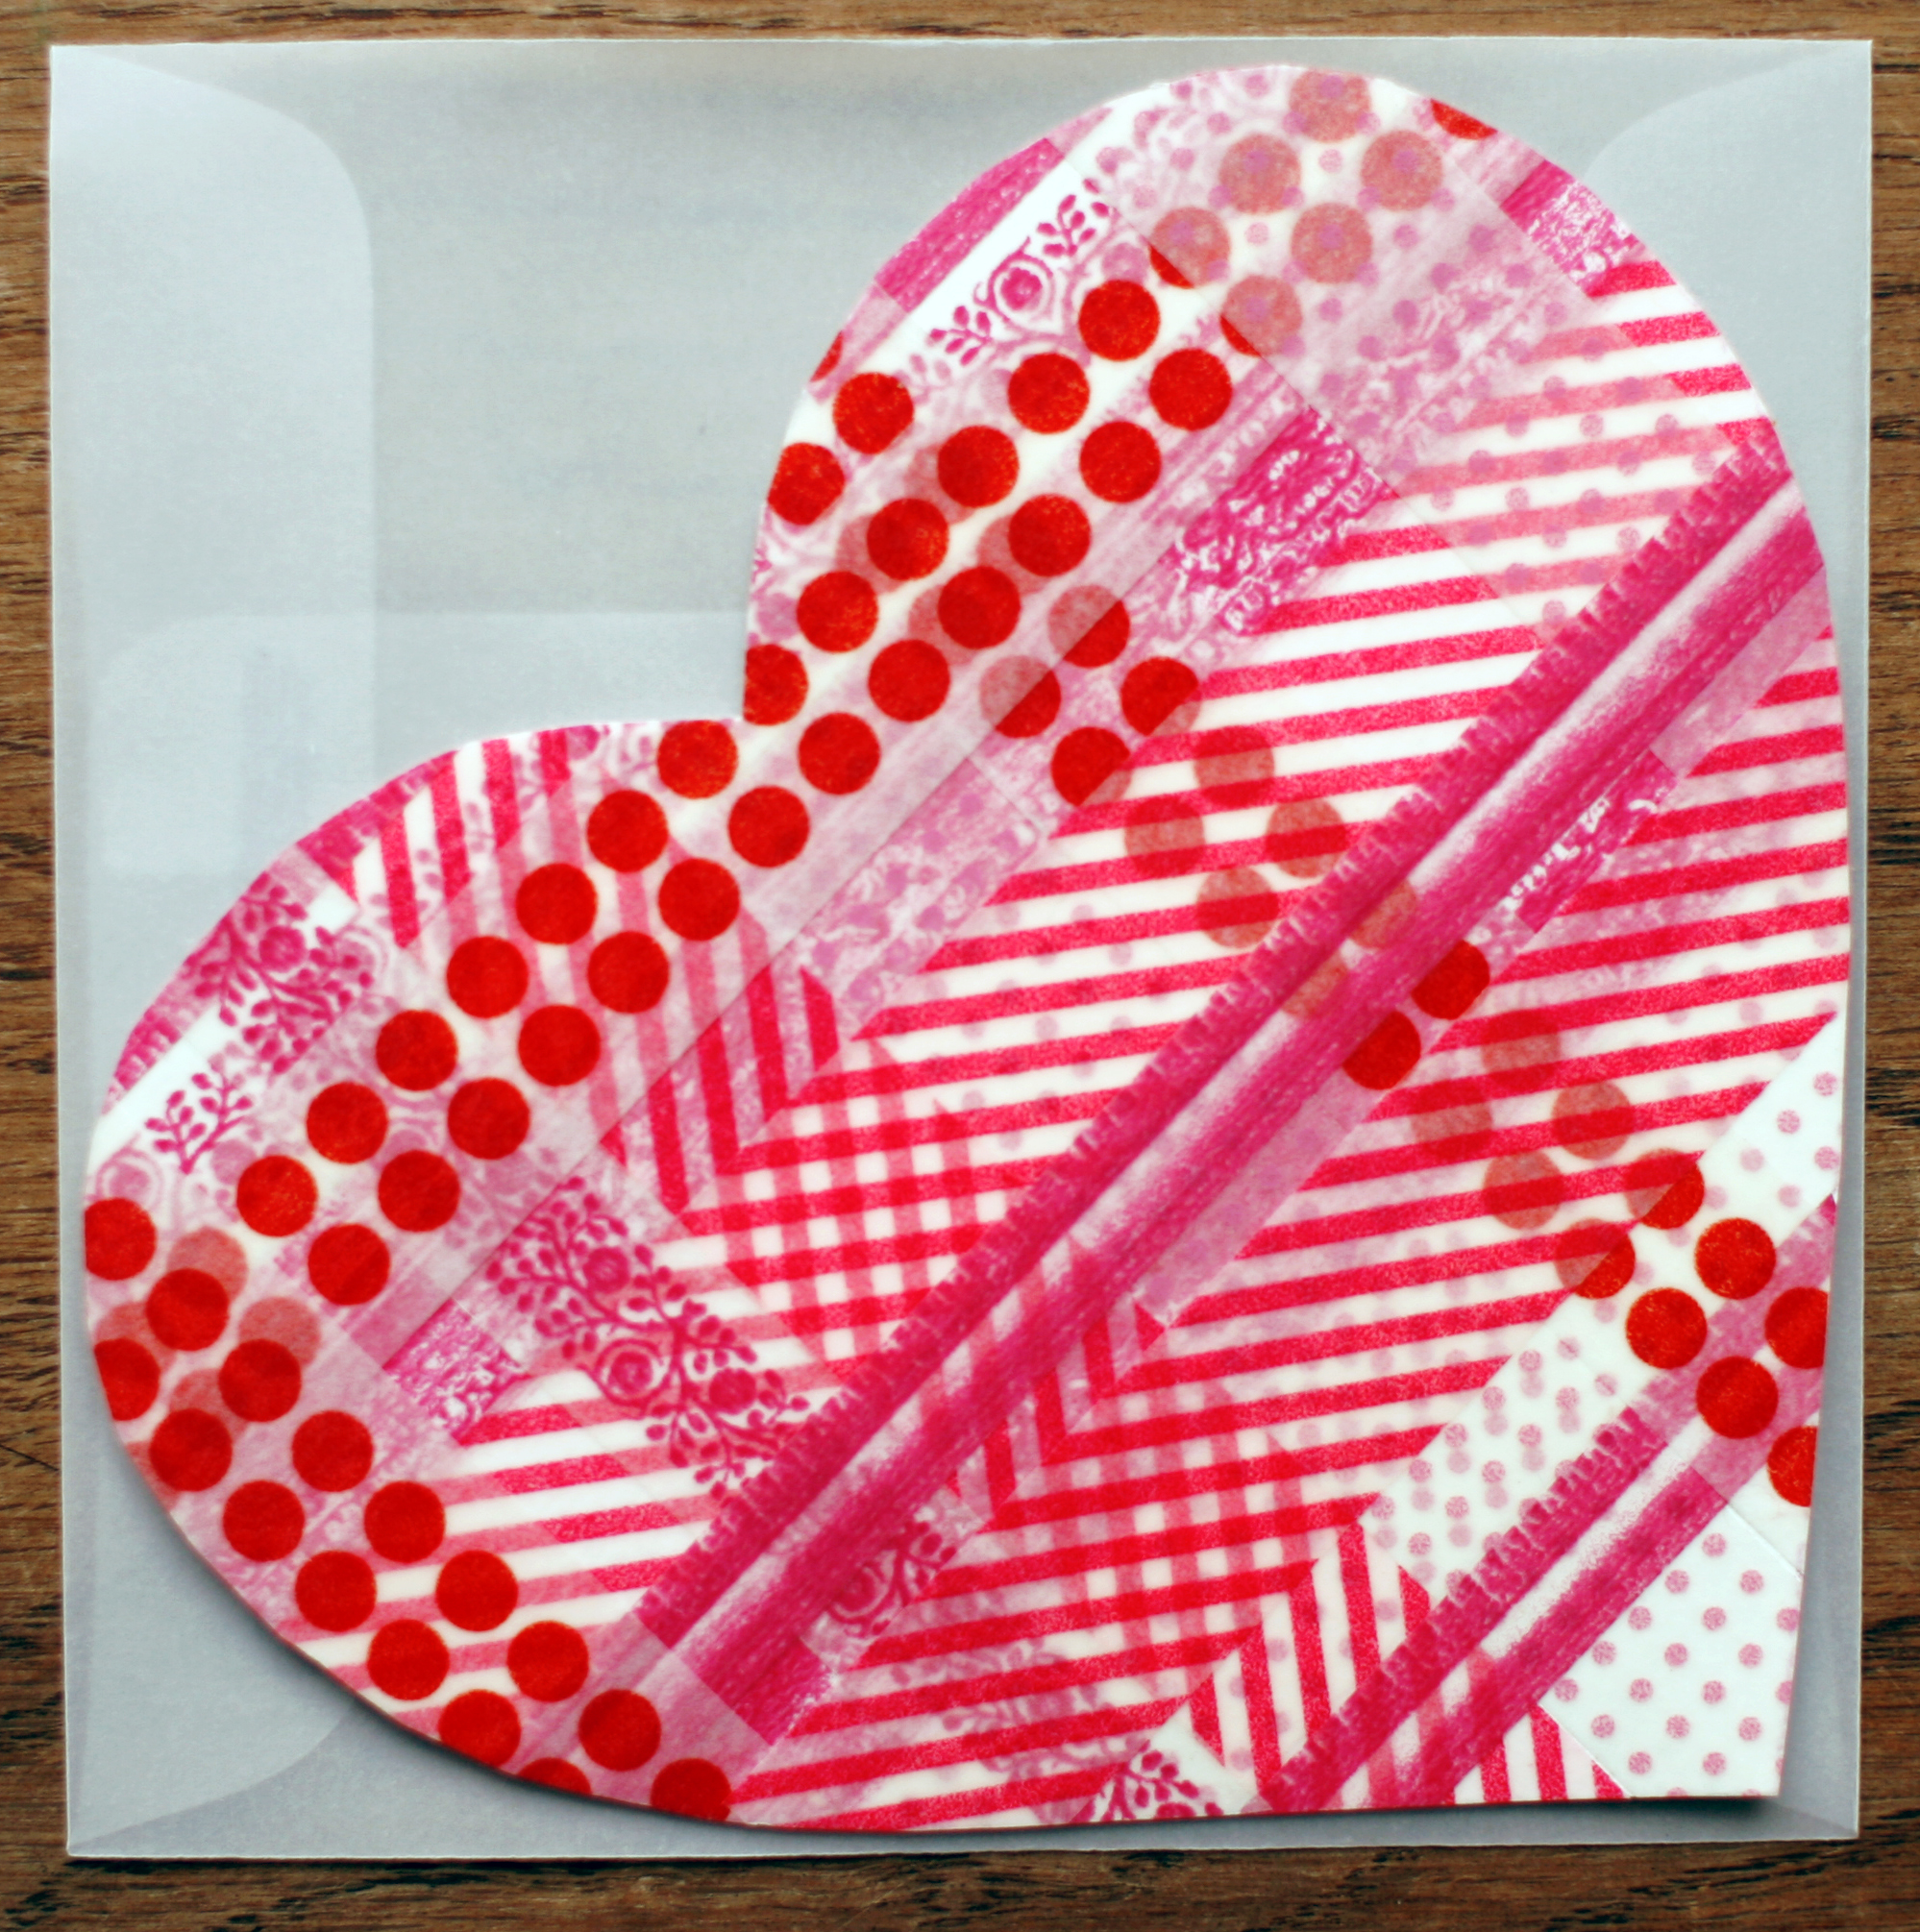
Happy February!  February 1st kicks off Valentine season around here.  We are digging out the decorations today, hanging wax hearts in the windows and fabric garland across the mantels.  I know some people like to hate on Valentine’s Day, but I really do love it.  Flowers, chocolate, pretty cards and grouping of red colors are some of my favorite things.  We are working on a few different DIY Valentine cards and will post the how-tos over the next few days.  This is a good project to make with kids as the washi tape tears easily by hand.  To make your own version of this Woven Washi Tape Valentine you will need:

*Card Stock

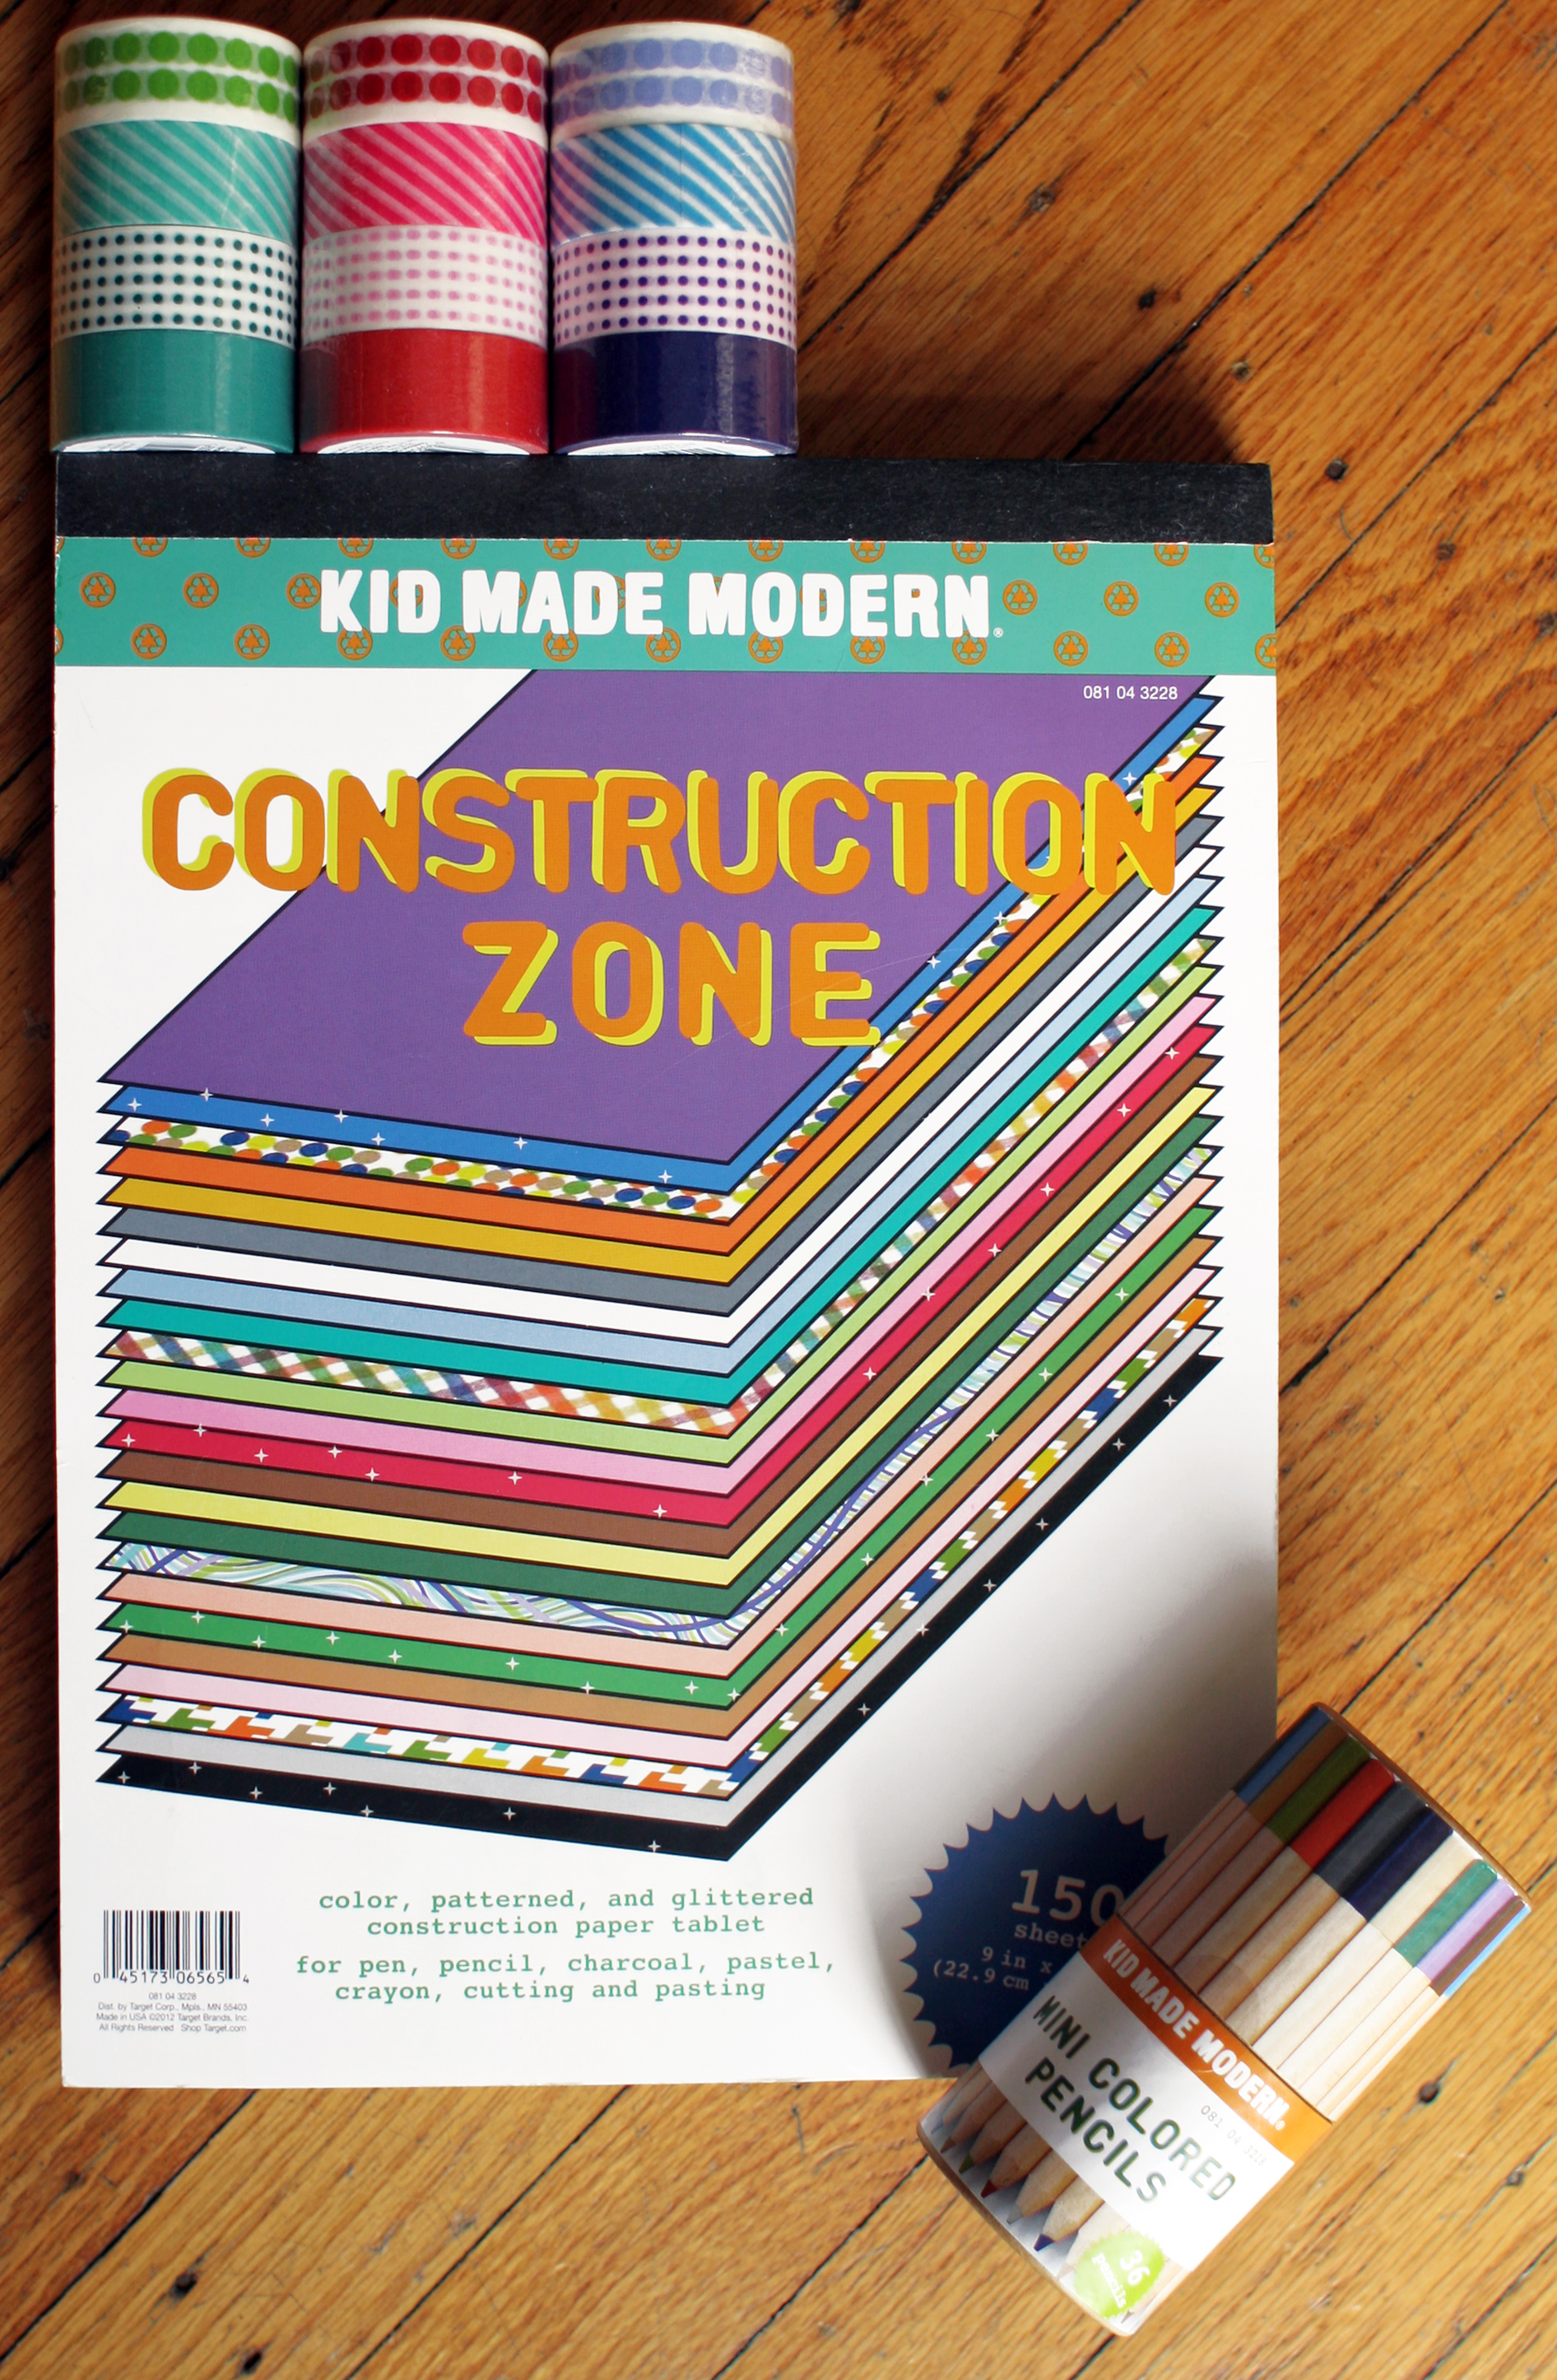
*Washi Tape in Red, Pink and White Colors

*Scissors

*Pencil

*Envelope (Optional)

1. To make heart shape, fold card stock in half and draw half a heart with the folded line in the center.  Cut out half heart while folded and then unfold.  Reuse this pattern by tracing on to other pieces of card stock.

2. Stick tape down on heart in alternating vertical and horizontal lines.  Be sure the tape extends to edges of heart, as you will trim excess at the end.

3. Once desired pattern is achieved, turn heart over and use scissors to trim excess tape.

4. Write your message and place in envelope.  These square vellum envelopes from Envelope Mall are our favorites.  We buy them in bulk and keep them ready for letter writing.

5. XOXO

Share this:

  • Share on Pinterest (Opens in new window) Pinterest
  • Share on Facebook (Opens in new window) Facebook
  • Share on LinkedIn (Opens in new window) LinkedIn
  • Share on Tumblr (Opens in new window) Tumblr
  • Share on X (Opens in new window) X
Like Loading...

Kid Gifts: Target Art Supplies

31 Thursday Jan 2013

Posted by jeannerondeau in Likes, Party!, Projects, Shop

≈ Leave a comment

Tags

art for kids, art supplies for kids, emergency party box, kid gifts, Kid Made Modern, living with kids, paper tape for kids, Target, Todd Oldham, washi tape

GiftsArt supplies are one of my favorite gifts for kids.  I try to keep a supply on hand for birthday gifts and moments of desperation.  These Kid Made Modern art supplies by Todd Oldham for Target occupy a large section in our emergency party box.  The quality is great and I love the Kid Made Modern packaging and smart, thoughtful art kits.  This Construction Zone block of paper has lots of great colors and patterns and different weights of paper.  The Mini Colored Pencils are perfect for little hands and the colors are beautiful.  I recently added these paper tapes from the Target office section to our arsenal.  The tapes come in packs of four and are $4 per pack.  My kids can spend hours tearing and sticking paper tape (exhibit A here).  It is good to be prepared.

Share this:

  • Share on Pinterest (Opens in new window) Pinterest
  • Share on Facebook (Opens in new window) Facebook
  • Share on LinkedIn (Opens in new window) LinkedIn
  • Share on Tumblr (Opens in new window) Tumblr
  • Share on X (Opens in new window) X
Like Loading...

Welcome Home Daddy!

28 Monday Jan 2013

Posted by jeannerondeau in Projects

≈ Leave a comment

Tags

construction paper decoration, diy, glue stick, home, homemade decorations, living with kids, welcome home banner

DaddyWe missed you!

I have a new-found appreciation for single parents.  It is hard hard work with little break and it is totally exhausting.  We are so happy to have Daddy home again.  Ada worked on presents and built block towers for Daddy all week.  She had me write out the words ‘Welcome Home Daddy’ and copied the letters to made this big banner.  Josie helped work the glue stick for attaching the decorations.  We punched holes in the corners and threaded the papers on ribbons for hanging.  Ada gave a little squeal in her sleep when Chris told her he was home last night.  Happy girls, happy family.

Share this:

  • Share on Pinterest (Opens in new window) Pinterest
  • Share on Facebook (Opens in new window) Facebook
  • Share on LinkedIn (Opens in new window) LinkedIn
  • Share on Tumblr (Opens in new window) Tumblr
  • Share on X (Opens in new window) X
Like Loading...

DIY Knitted Hot Water Bottle Sweater

25 Friday Jan 2013

Posted by jeannerondeau in Projects

≈ Leave a comment

Tags

cure for the common cold, diy, DIY hot water bottle sweater, DIY knitted hot water bottle cover, easy knittting pattern, free knit pattern, Garment House, hot water bottle, hot water bottle for kids, knit hot water bottle cover

WaterBottle1WaterBottle2We caught a family cold this week and this sweater-covered hot water bottle has been in heavy rotation.  Luckily the girls were angels when it was Mommy’s turn to be sick.  Yesterday Ada took Josie downstairs, made butter sandwiches for them both (yes butter, not peanut butter), swept up the crumbs and put them in the compost bin.  Sometimes four-year-olds can amaze you when you really need them to.

The hot water bottle’s knitted cover (or sweater as Josie calls it) keeps it toasty for most of the night but also buffers little tummies from too-hot rubber.  I modified this pattern from Garment House (formerly Green Olives Design).  (Elly’s pocket water bottle cover is even cuter).  The pattern is simple, quick and takes less than a ball of worsted weight yarn.  We used a simple loose stitch to close up the bottom and stitches can be undone for a good hand-washing.  A hot water bottle and a box of clementins are high on our list of cures for the common cold.

Share this:

  • Share on Pinterest (Opens in new window) Pinterest
  • Share on Facebook (Opens in new window) Facebook
  • Share on LinkedIn (Opens in new window) LinkedIn
  • Share on Tumblr (Opens in new window) Tumblr
  • Share on X (Opens in new window) X
Like Loading...

The Magic Garden

23 Wednesday Jan 2013

Posted by jeannerondeau in Party!, Projects, Shop

≈ 1 Comment

Tags

crystal garden, educational kids toy, kid gifts, kid party favors, kids party, Magic Garden, Mystical Garden, Pearl River, science with kids, Toysmith

MagicGarden1MagicGarden2MagicGarden3Do you remember these?  We used to get smaller versions when we were kids, but I’d never seen one quite so elaborate until I found this at Pearl River.  This Mystical Garden by Toysmith has cardboard trees, grass and a mountain to assemble before the mystery liquid is poured into the base.  (This assembly is best done by an adult).  Our crystals formed within the hour and were done growing within 10 hours.  The mountain really looked like it was growing snow and the trees bloomed cherry blossoms.  Kids should not touch the crystals or liquid, but these are pretty amazing to watch grow on a shelf.  The small price tag makes this Mystical Garden a fun party favor or add-on gift for kids.  Magic.

Share this:

  • Share on Pinterest (Opens in new window) Pinterest
  • Share on Facebook (Opens in new window) Facebook
  • Share on LinkedIn (Opens in new window) LinkedIn
  • Share on Tumblr (Opens in new window) Tumblr
  • Share on X (Opens in new window) X
Like Loading...

Keeping House: Flowers

17 Thursday Jan 2013

Posted by jeannerondeau in Organizing, Projects

≈ Leave a comment

Tags

Bluebird of Happiness, Casa Blanca Lily, cut flower care, flea market find, flowers at home, fresh flowers, home, how to care for lilies

Flowers1Flowers2Fresh flowers make everything better, in my opinion.  These Casa Blanca lilies are one of my favorites.  Casa Blancas are fragrant and will last for more than a week.  We get ours for $5 a stem around here.  I like to buy lilies when their buds are closed and watch them open a little more each day.  Each Casa Blanca stem is so full of flowers that we often cut off singles to put in small vases for the bathrooms.  Our Bluebird of Happiness pitcher was an $8 flea market find.  To make your lilies last longer:

*Cut flower stems and place in water as soon as you get home.

*Be sure to add flower food to the water.  (Ask the florist for a couple of packets).

*Remove pollen anthers as soon as each bloom opens.  (If you miss picking one before it gets messy and fuzzy, use a pipe cleaner to dust pollen off of petals).

*Change water every four days.  Recut stems, add more flower food and be sure stems are submerged.

*Remove old blooms as they fade.

Enjoy!

Share this:

  • Share on Pinterest (Opens in new window) Pinterest
  • Share on Facebook (Opens in new window) Facebook
  • Share on LinkedIn (Opens in new window) LinkedIn
  • Share on Tumblr (Opens in new window) Tumblr
  • Share on X (Opens in new window) X
Like Loading...

Party! DIY Mini Felt Hats

16 Wednesday Jan 2013

Posted by jeannerondeau in Projects, Uncategorized

≈ 2 Comments

Tags

animal party hats, diy, DIY party hat, kids party, mini felt party hats, mini flag banner, Oh Happy Day!, party hats for animals, toy party hats

PartyAnimials1Hat3Hat2HatWe have been planning to make the animals some felt party hats for a while.  Now that the holidays are over and the weather is gloomy the animals are ready for a party.  We loved these paper party hats from Oh Happy Day!  We wanted to make our hats a little more durable for play so our version uses felt, glue and elastic thread.  Ada made the flag banner in the background with color chips and a hole punch.  To make your own Mini Felt Party Hats you will need:

*Card Stock or Paper for Pattern

*Assorted Felt

*Mini Pom Poms

*Scissors

*Needle and Thread

*Glue

*Elastic Thread (We used 9mm)

1. Using the pattern above, cut out felt shapes to fit your animals.

2. Stitch two straight edges of felt together.

3. Stitch pom pom on top and tie thread.  (I pushed the needle up through the top of the hat and then through the pom pom).

4. Using the needle, bring elastic thread through two sides of hat and tie knots inside.  Adjust per animal as needed.

5. Squirt glue inside hat, spreading evenly along the inside.  Allow hat to dry on its side, being careful not to squish the hat out of shape.  The glue will cause the felt to stiffen as it dries, making it more durable.

6. When hats are dry, dress the animals and bake a cake!

Share this:

  • Share on Pinterest (Opens in new window) Pinterest
  • Share on Facebook (Opens in new window) Facebook
  • Share on LinkedIn (Opens in new window) LinkedIn
  • Share on Tumblr (Opens in new window) Tumblr
  • Share on X (Opens in new window) X
Like Loading...

Flea Market Finds: Vintage Flower Pots

15 Tuesday Jan 2013

Posted by jeannerondeau in Projects, Vintage

≈ 2 Comments

Tags

Ebay vintage flower pot, Etsy vintage flower pot, flower pots, forcing paperwhites, greens, home, McCoy, USA Pottery, vintage flower pot, vintage planter

PotsThere is nothing better than a bit of green on a cloudy winter day.  Our paperwhites are shooting up stems and leaves and are almost ready to bloom.  We plant the bulbs in lined vintage pots from our collection and count the days until we see the tiny white flowers.  The pots get new plantings and go outside in warmer weather.  I like to group the planters by color and we use vintage plates and bowls as drip catchers.  McCoy and USA pots are some of my favorites.  The pots’ happy colors and subtle designs were originally made as inexpensive ways to brighten the home, (although prices for rare pieces can now be high).  Most of the pieces in our collection were made in the 1940s and 1950s and we usually find them at antique shops and flea markets for under $15.  Ebay and Etsy have a wide variety of vintage flower pots and planters.  To plant your own forced paperwhites you will need:

*Forced Paperwhite Bulbs (These have been put through a period of dormancy and tricked into thinking that the inside of your house is a warm spring day)

*Pots

*Plastic Liner (If your flower pot has drainage holes.  Two layers of Ziplock bags will also work)

*Pebbles, Rocks or Soil (We use small pebbles which we wash and reuse year after year.  The little stones are pretty and they help hold down the bulbs as they grow.  Pebbles are available at florist, pet or hardware stores)

*Plates, Saucers, Bowls to Fit Under Flower Pots

1. Line your flower pot as needed.  The bulbs need a constant source of water, so any drainage holes must be stopped up.

2. Fill pot about half way with pebbles.

3. Place bulbs into pot.  The shoots should face up, roots down.  We usually put 1-3 bulbs in each pot, depending on the size.

4. Fill pebbles in around bulbs.  Pebbles should reach the top of the rim and almost cover bulbs, leaving the shoots exposed.

5. Place saucer beneath and water your bulbs.  Water should be filled to about half-way up the bulb.  This will allow the roots a constant water source, but keep the shoots and bulb from rotting.

6. Place pots in a spot with indirect sunlight and watch them grow.  They will last longer away from window and bloom faster if they get more sunlight.  Ours are near a window and usually bloom in three weeks.

Enjoy!

Share this:

  • Share on Pinterest (Opens in new window) Pinterest
  • Share on Facebook (Opens in new window) Facebook
  • Share on LinkedIn (Opens in new window) LinkedIn
  • Share on Tumblr (Opens in new window) Tumblr
  • Share on X (Opens in new window) X
Like Loading...

DIY Glitter Thank-you Postcards

03 Thursday Jan 2013

Posted by jeannerondeau in Projects

≈ 1 Comment

Tags

corner punch, corner rounder, crafts with kids, diy, DIY Thank you cards, glitter craft, home, Wow Glitter

Postcards1

GlitterPostcards2

I originally planned to make our thank-you cards by cutting apart holiday cards once the holidays were over.  Ada decided she wanted to keep the cards forever in her “special papers” box and refused to let the scissors anywhere near.  Luckily, she got glitter for Christmas.  So we cut some card stock into postcard sizes, rounded the edges with this corner-cutting rounder and let the girls go crazy with glue, glitter and crayons.  I love this set of glitter’s rainbow colors and variety of shapes.  (Thank you Aunt Anna!)  The glitter tubes are just small enough for little hands to grasp, and the shakers on top do a good job of controlling the glitter storm that usually erupts when a four-year-old gets to do her own shaking.  To make your own postcards you will need:

*Card Stock

*Scissors

*Corner Punch

*Crayons

*Craft Glue

*Glitter

1. Trim card stock to postcard size (The standard is 4″ x 6″).

2. Using the punch, round corners.

3. Let the kids color, glue and glitter.  (This works best if you color first.  I liked the cards that combined Josie’s coloring with Ada’s glittering).

4. Allow cards to dry, write your message and addresses on back.

5. Pop them in the mail.  Thank-yous done.

Share this:

  • Share on Pinterest (Opens in new window) Pinterest
  • Share on Facebook (Opens in new window) Facebook
  • Share on LinkedIn (Opens in new window) LinkedIn
  • Share on Tumblr (Opens in new window) Tumblr
  • Share on X (Opens in new window) X
Like Loading...

Flea Market Find: Pegboard Towel Rack

02 Wednesday Jan 2013

Posted by jeannerondeau in Projects, Vintage

≈ 3 Comments

Tags

antique shopping, clawfoot tub, flea market find, home, home renovation, Northwood NH antiques, old house, style, vintage bathroom, vintage pegboard

Rack

I found this rack for $8 at an antique shop in Northwood, NH.  We weren’t sure what it was originally used for, but the color and price were right.  (It is genetically impossible for me to pass up a bargain with potential).  Our upstairs bathroom has a funky layout with no space for hanging towels, so Chris added some hooks and hung the pegboard on the wall above the tub.  Some days we have to hold ourselves back from digging under the old floors in this house and knocking down walls with our hammers.  (What the heck is under the tile that completely encases the clawfoot tub upstairs?)  Other days we can make peace with the slow renovation of an old house, one dependent on time and money we don’t always have right this minute.  Some days we can be happy with an $8 towel rack, and move on with life for the time being.

Share this:

  • Share on Pinterest (Opens in new window) Pinterest
  • Share on Facebook (Opens in new window) Facebook
  • Share on LinkedIn (Opens in new window) LinkedIn
  • Share on Tumblr (Opens in new window) Tumblr
  • Share on X (Opens in new window) X
Like Loading...
← Older posts
Newer posts →

Visit Our Etsy Store

Etsy Store Instagram

No Instagram images were found.

Categories

  • Brooklyn
  • Inspiration
  • Likes
  • Organizing
  • Our Etsy Store
  • Party!
  • Projects
  • Shop
  • Uncategorized
  • Vintage

Recent Posts

  • Visit Us at the Brooklyn Flea!
  • Inspiration
  • Inspiration
  • Winter Whites
  • Ocean Grove, NJ

Archives

Enter your email address to follow this blog and receive notifications of new posts by email.

Join 179 other subscribers

Blogs I Read

  • A Beautiful Mess
  • Anthology Magazine
  • Apartment Therapy Family (Ohdeedoh)
  • Bleubird Vintage
  • Katie's Pencil Box
  • Le Dans La
  • Making it Lovely
  • Oh Happy Day!
  • Oh My Little Dears
  • Purl Bee
  • Soulemama
  • Sweet Paul Magazine
  • The Sweetest Occasion
  • You Are My Fave

Copyright

All content is © 2010-2018 Jeanne Rondeau. Please do not copy or take images or content from this site without my permission. Requests may be sent to: jeanne@jeannerondeau.com Thank you!

Meta

  • Create account
  • Log in
  • Entries feed
  • Comments feed
  • WordPress.com

Blog at WordPress.com.

Privacy & Cookies: This site uses cookies. By continuing to use this website, you agree to their use.
To find out more, including how to control cookies, see here: Cookie Policy
  • Subscribe Subscribed
    • Domesticspace
    • Join 179 other subscribers
    • Already have a WordPress.com account? Log in now.
    • Domesticspace
    • Subscribe Subscribed
    • Sign up
    • Log in
    • Report this content
    • View site in Reader
    • Manage subscriptions
    • Collapse this bar
 

Loading Comments...
 

    %d